-
회원정보 수정 2Spring Boot/회원 관리 4 - 회원정보 수정 2021. 12. 11. 23:54
프로필 수정 파일
<update.jsp 파일>
			<form id="profileUpdate"">
				<div class="content-item__02">
					<div class="item__title">이름</div>
					<div class="item__input">
						<input type="text" name="name" placeholder="이름"
							value="${principal.user.name}" />
					</div>
				</div>
				<div class="content-item__03">
					<div class="item__title">유저네임</div>
					<div class="item__input">
						<input type="text" name="username" placeholder="유저네임"
							value="${principal.user.username}" readonly="readonly" />
					</div>
				</div>
				<div class="content-item__04">
					<div class="item__title">패스워드</div>
					<div class="item__input">
						<input type="password" name="password" placeholder="패스워드"  />
					</div>
				</div>
				<div class="content-item__05">
					<div class="item__title">웹사이트</div>
					<div class="item__input">
						<input type="text" name="website" placeholder="웹 사이트"
							value="${principal.user.website}" />
					</div>
				</div>
				<div class="content-item__06">
					<div class="item__title">소개</div>
					<div class="item__input">
						<textarea name="bio" id="" rows="3">${principal.user.bio}</textarea>
					</div>
				</div>
				<div class="content-item__07">
					<div class="item__title"></div>
					<div class="item__input">
						<span><b>개인정보</b></span> <span>비즈니스나 반려동물 등에 사용된 계정인 경우에도
							회원님의 개인 정보를 입력하세요. 공개 프로필에는 포함되지 않습니다.</span>
					</div>
				</div>
				<div class="content-item__08">
					<div class="item__title">이메일</div>
					<div class="item__input">
						<input type="text" name="email" placeholder="이메일"
							value="${principal.user.email}" readonly="readonly" />
					</div>
				</div>
				<div class="content-item__09">
					<div class="item__title">전회번호</div>
					<div class="item__input">
						<input type="text" name="phone" placeholder="전화번호"
							value="${principal.user.phone}" />
					</div>
				</div>
				<div class="content-item__10">
					<div class="item__title">성별</div>
					<div class="item__input">
						<input type="text" name="gender" value="${principal.user.gender}" />
					</div>
				</div>

				<!--제출버튼-->
				<div class="content-item__11">
					<div class="item__title"></div>
					<div class="item__input">
						<button type="button" onclick="update(${principal.user.id})">제출</button>
					</div>
				</div>
				<!--제출버튼end-->

			</form>
위의 파일이 회원정보수정 페이지를 나타내는 코드이며, 그 결과 아래와 같은 화면이 사이트에 나오게 된다.
내용에 보면, value = ${principal.user.name}
이런식으로 값이 채워져 있는데, 아래에 나와있지 않은 이유는, 내가 그 값들을 지웠거나, 빈 값이라서 나오지 않음

아무튼, 저 페이지에 회원정보를 입력하고 제출 버튼을 누르면 회원정보가 변경되도록 하려고 한다.
(자바스크립트에서 ajax를 이용할 거임)
특히 update.jsp 파일 아래에
<script src="/js/update.js"></script>이와 같은 코드가 있어서,
update.jsp 파일이 위에서부터 아래로 실행되면서, 결국 update.js 파일을 읽는다.
그래서 update.js 파일에 있는 함수들이 실행되는데,
<update.js> 파일
function update(userId) {

	let data = $("#profileUpdate").serialize();

	console.log(data);

}
이런함수가 있다.
update.jsp 파일을 자세히 보면 주석으로 제출버튼이라고 쓰여있는 부분에
<button type="button" onclick="update(${principal.user.id})">제출</button>이러한 함수를 요청한다.
즉, form 태그에 값들을 입력하고 제출 버튼을 누르면, 그 값들을 들고 update.js 파일의 update 함수가 실행된다.
위의 코드에서
onclick="update(${principal.user.id})"
이 부분이, update 메서드를 실행하라는 뜻이다.
그래서, update 메서드를 자세히 살펴보면
let data = $("#profileUpdate").serialize();1) $("#profileUpdate")
jsp 파일에서
id="profileUpdate" 인 것을 찾아서,
(우리의 경우 update.jsp 파일의 form 태그의 id 값인데)
2) .serialize();
데이터를 보내기 위해 폼 요소 집합을 문자열로 인코딩
사이트 회원정보변경 페이지에서
name, username, password, website(웹사이트주소) , bio(소개) 칸에 모두
hi 라고 입력한 뒤 제출 버튼을 누르면,
update.js 파일의 update 메서드가 실행되면서,
let data = $("#profileUpdate").serialize();
이것이 실행되고,
그래서 아래처럼 입력한 값들이 serialize 되서
f 12 , console 창에 아래와 같이 나왔다.

이 값들은 내가 중간에 자른 것으로 이 외에도 phone, gender 등 여러 값들이 나온다.
update.js 파일에다가 나머지 부분을 입력하면,
function update(userId) {

	let data = $("#profileUpdate").serialize();

	console.log(data);

		$.ajax({
		type: "put",
		url : `/api/user/${userId}`,
		data: data,
		contentType: "application/x-www-form-urlencoded; charset=utf-8",
		dataType: "json"
	}).done(res=>{
		console.log("update 성공");

	}).fail(error=>{
		console.log("update 실패");
	});

}
설명 1)
data: datadata: 서버로 데이터 전송 시 사용
즉,
let data = $("#profileUpdate").serialize();이 data를 전송
설명 2)
contentType: "application/x-www-form-urlencoded; charset=utf-8"여기서 contentType 이란,
let data = $("#profileUpdate").serialize();이 data 에 대한 설명이다.
위에서
라는 결과가 나왔는데,
이처럼
key = value 형식을
mime 타입에서
application/x-www-form-urlencoded 형식이라고 한다.
그리고 문자 인코딩 방식 : utf-8
더보기(mime 타입이란, 클라이언트에게 전송된 문서의 다양성을 알려주기 위한 메커니즘)
참고 자료 : https://developer.mozilla.org/ko/docs/Web/HTTP/Basics_of_HTTP/MIME_types
MIME 타입 - HTTP | MDN
MIME 타입이란 클라이언트에게 전송된 문서의 다양성을 알려주기 위한 메커니즘입니다: 웹에서 파일의 확장자는 별 의미가 없습니다. 그러므로, 각 문서와 함께 올바른 MIME 타입을 전송하도
developer.mozilla.org
설명 3)
dataType: "json"dataType 이란, 우리가 응답을 받을때 받고자 하는 데이터 형식.
즉, json타입으로 데이터를 응답받을 것이다.
그러면 아래에 res가 있는데,
.done(res=>{위에서 json 형식 데이터를
자바스크립트 형식으로 파싱하여 res 로 응답 받음
ajax로 요청하면 데이터로 응답해줌
이 때 데이터로 응답하는 거를 api 라고 함
이처럼 회원수정 페이지에서 사용자가 수정하는 값들을 받을 건데,
이 데이터(수정하는 값)를 받을 dto를 만들 것. (그래서 ApiController클래스에도 애노테이션 @RestController 사용)
그런데, (회원수정 페이지에서) username, email 만 변경 불가하도록 하고, 나머지 값들은 받을 것
즉, name, password, website, bio, phone, gender 값 받음
<UserUpdateDto.java 파일>
@Data
public class UserUpdateDto {

	private String name; // 필수
	private String password; // 필수
	private String website;
	private String bio;
	private String phone;
	private String gender;

	// 조금 위험
	public User toEntity() {
		return User.builder()
				.name(name)
				.password(password)
				.website(website)
				.bio(bio)
				.phone(phone)
				.gender(gender)
				.build();
	}
}
name, password 는 필수로 받을 거고 나머지는 필수로 받지 않아도 되어서,
여기서의 public User toEntity() 메서드가 조금 위험함.
만약 사용자가 name 란을 입력하지 않으면 데이터베이스가 공백이 됨
이게 문제임.
왜냐하면, User.java 파일에 name과 password는
	@Column(nullable = false)
	private String password;
	@Column(nullable = false)
	private String name;
이런식으로 nullable = false 로 되어 있음
그러니깐 공백이면 안됨
(이 부분 나중에 처리)
그리고 이를 받아서 putmapping 해주도록 controller 만듦
<UserApiController.java> 파일
@RestController
public class UserApiController {


	@PutMapping("/api/user/{id}")
	public String update(UserUpdateDto userUpdateDto) {
		System.out.println(userUpdateDto);
		return "ok";
	}
}
아무튼 이렇게 만든 뒤
회원변경 페이지에서 모든 값들을 hi라고 입력한 뒤 제출버튼 누르면
아래 코드로 인해
System.out.println(userUpdateDto);sts(이클립스)콘솔창에 아래와 같이 변경되는 값들을 받아옴

update.js 파일에서의 아래와 같은 코드로 인해
	let data = $("#profileUpdate").serialize();

	console.log(data);
사이트 f 12 버튼, console 창에도 아래와 같이 값이 나오는데, (password 뒤의 website 값 등은 잘라냈음)

실패가 나온 이유는,
update.js 에서 json 형태로 받기로 했는데, UserApiController.java 에서
return "ok";즉, String 을 리턴해서 그러함.
지금은 일단 무시해도됨
데이터베이스에 회원정보 넣기
findById 메서드에서 id =1 번으로 찾았을 때, 데이터베이스에서 1번 유저가 없으면 null 이 리턴됨
그래서 자바에서는 Optional 을 만들어줌.
인터페이스 CrudRepository 에 들어가 보면 아래와 같이 볼 수 있음.
즉 반환을 Optional 타입으로
Optional<T> findById(ID id);Optional 로 3가지 처리 가능
1) 무조건 찾음 : get()
2) 못 찾았으니, exception 발생 : orElseThrow()
3)번째 것은 별로 중요하지 않음.
일단 현재는 get()으로 처리. 나중에 orElseThrow() 로 변경
UserService.java 의 회원수정 메서드에서는, 2가지가 일어난다.
첫째는 영속화,
둘째는, 영속화된 오브젝트 수정(업데이트 완료)
가. 영속화
User userEntity = userRepository.findById(id).get();일단 위와 같이 id로 데이터베이스에서 찾아서 userEntity 에 담음 -> 영속화
이 과정을 자세히 보자면,

스프링 서버에서 데이터베이스에 1번 유저 정보를 요청한다. (findById(1))
그러면 데이터베이스는 1번 유저 정보를 찾고,
(서버와 데이터베이스 사이의) 영속성 컨텍스트에 그 정보가 들어감
-> 영속화 됨
나. 업데이트(영속화된 오브젝트 수정)
(영속성 컨텍스트에 들어가 있는) 영속화된 데이터에는 1번 유저의 각종 데이터 id, username, password 등이 있음
만약 id =1, username = hi, password = hi 였을때, 이 값들을
id =1, username = hello, password = hello
이런식으로 수정만 하면, 자동으로 데이터베이스에 변경된 정보가 반영됨
-> 업데이트 함
(업데이트 쿼리 없어도 위 과정으로 업데이트 됨)
<UserService.java> 파일
	@Transactional
	public User 회원수정(int id, User user) {
		// 1. 영속화
		User userEntity = userRepository.findById(id).get();

		// 2. 영속화된 오브젝트를 수정
		userEntity.setName(user.getName());

		String rawPassword = user.getPassword();
		String encPassword = bCryptPasswordEncoder.encode(rawPassword);

		userEntity.setPassword(encPassword);
		userEntity.setBio(user.getBio());
		userEntity.setWebsite(user.getWebsite());
		userEntity.setPhone(user.getPhone());
		userEntity.setGender(user.getGender());
		return userEntity;
	}
    // 3. 더티체킹이 일어나서 업데이트가 완료됨.
2번에서 데이터들을 수정해주고 나서,
(비밀번호는 다시 해쉬화 하는 과정을 한 번 더 거침)
회원수정 메서드의 모든 괄호가 끝난 3번에서 더티체킹이 일어나고 업데이트가 완료됨
더보기더티체킹이란, 상태 변경 검사로, JPA 에서는 트랙잭션이 끝나는 시점에 변화가 있는 모든 엔티티 객체를 데이터베이스에 자동 반영
참고 자료 : https://jojoldu.tistory.com/415
<UserApiController.java> 파일
@RequiredArgsConstructor @RestController public class UserApiController { private final UserService userService; @PutMapping("/api/user/{id}") public CMRespDto<?> update(@PathVariable int id, UserUpdateDto userUpdateDto) { User userEntity = userService.회원수정(id, userUpdateDto.toEntity()); return new CMRespDto<>(1, "회원수정완료", userEntity); } }더보기UserService.java, UserApiController.java 파일 외에도 필요한 다른 파일도 첨부하자면, (위에서 첨부했었음)
<Update.jsp 파일>
			<form id="profileUpdate"">
				<div class="content-item__02">
					<div class="item__title">이름</div>
					<div class="item__input">
						<input type="text" name="name" placeholder="이름"
							value="${principal.user.name}" />
					</div>
				</div>
				<div class="content-item__03">
					<div class="item__title">유저네임</div>
					<div class="item__input">
						<input type="text" name="username" placeholder="유저네임"
							value="${principal.user.username}" readonly="readonly" />
					</div>
				</div>
				<div class="content-item__04">
					<div class="item__title">패스워드</div>
					<div class="item__input">
						<input type="password" name="password" placeholder="패스워드"  />
					</div>
				</div>
				<div class="content-item__05">
					<div class="item__title">웹사이트</div>
					<div class="item__input">
						<input type="text" name="website" placeholder="웹 사이트"
							value="${principal.user.website}" />
					</div>
				</div>
				<div class="content-item__06">
					<div class="item__title">소개</div>
					<div class="item__input">
						<textarea name="bio" id="" rows="3">${principal.user.bio}</textarea>
					</div>
				</div>
				<div class="content-item__07">
					<div class="item__title"></div>
					<div class="item__input">
						<span><b>개인정보</b></span> <span>비즈니스나 반려동물 등에 사용된 계정인 경우에도
							회원님의 개인 정보를 입력하세요. 공개 프로필에는 포함되지 않습니다.</span>
					</div>
				</div>
				<div class="content-item__08">
					<div class="item__title">이메일</div>
					<div class="item__input">
						<input type="text" name="email" placeholder="이메일"
							value="${principal.user.email}" readonly="readonly" />
					</div>
				</div>
				<div class="content-item__09">
					<div class="item__title">전회번호</div>
					<div class="item__input">
						<input type="text" name="phone" placeholder="전화번호"
							value="${principal.user.phone}" />
					</div>
				</div>
				<div class="content-item__10">
					<div class="item__title">성별</div>
					<div class="item__input">
						<input type="text" name="gender" value="${principal.user.gender}" />
					</div>
				</div>

				<!--제출버튼-->
				<div class="content-item__11">
					<div class="item__title"></div>
					<div class="item__input">
						<button type="button" onclick="update(${principal.user.id})">제출</button>
					</div>
				</div>
				<!--제출버튼end-->

			</form>
<update.js 파일>
function update(userId) {

	let data = $("#profileUpdate").serialize();

	console.log(data);

		$.ajax({
		type: "put",
		url : `/api/user/${userId}`,
		data: data,
		contentType: "application/x-www-form-urlencoded; charset=utf-8",
		dataType: "json"
	}).done(res=>{
		console.log("update 성공");

	}).fail(error=>{
		console.log("update 실패");
	});

}
<User.java> 파일
@Builder
@AllArgsConstructor
@NoArgsConstructor
@Data
@Entity
public class User {
	@Id
	@GeneratedValue(strategy = GenerationType.IDENTITY)
	private int id;

	@Column(length = 100,  unique = true)
	private String username;
	@Column(nullable = false)
	private String password;
	@Column(nullable = false)
	private String name;
	private String website; // 웹 사이트
	private String bio; // 자기 소개
	@Column(nullable = false)
	private String email;
	private String phone;
	private String gender;
	private String role; // 권한


	private String profileImageUrl;
	private LocalDateTime createDate;

	@PrePersist
	public void createDate() {
		this.createDate = LocalDateTime.now();
	}

}
이제, 회원정보수정 페이지에서
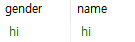
모든 값들을 hi로 변경시키면 데이터베이스에 아래와 같이 hi로 변경되어 있음
나머지 id, username 등도 변경되었으나, 그냥 2개만 첨부
그런데, 문제는 회원정보수정 페이지에 다시 들어가보면
위에서 전화번호, 성별 등 모든 값을 hi로 변경했음에도
아래와 같이 변경되지 않은 상태가 되는데,
(데이터베이스는 변경됐음)

이는 세션 정보가 바뀌지 않아서 그러함.
그래서 바꾸자면
<UserApiController.java> 파일 - 변경
@PutMapping("/api/user/{id}")
	public CMRespDto<?> update(@PathVariable int id, UserUpdateDto userUpdateDto, @AuthenticationPrincipal PrincipalDetails principalDetails) {
		User userEntity = userService.회원수정(id, userUpdateDto.toEntity());
		principalDetails.setUser(userEntity);
		return new CMRespDto<>(1,  "회원수정완료", userEntity);
	}
이렇게 하면 되는 이유가, 회원정보변경 페이지에서 세션정보를 PrincipalDetails 객체 내부의 User 객체 변수를 이용해서 화면에 뿌리는데,
principalDetails.setUser(userEntity);그래서 이렇게 principalDetails 객체에 user 객체 정보를 넣어주고(세션 정보 변경) update.jsp 파일(회원정보변경 페이지) 에서
시큐리티 taglibs 로 아래와 같이 사용.
(아래에서 principal이 principalDetails 객체를 의미함.)
${principal.user.username}그러면 아래와 같이 잘 변경되어 있는 것 확인.

마무리
이제 회원정보가 수정된 후 원래 페이지로 다시 이동하도록
update.js 파일을 조금 수정해주면 깔끔하게 처리된다.
function update(userId) {

	let data = $("#profileUpdate").serialize();

	console.log(data);

		$.ajax({
		type: "put",
		url : `/api/user/${userId}`,
		data: data,
		contentType: "application/x-www-form-urlencoded; charset=utf-8",
		dataType: "json"
	}).done(res=>{
		console.log("update 성공");
		location.href = `/user/${userId}`;

	}).fail(error=>{
		console.log("update 실패");
	});

}
성공 코드에 아래 부분 추가함.
location.href = `/user/${userId}`;즉, 회원정보 수정 후 성공하면 /user/${userId} 페이지로 이동하도록 함.
이에 이어서 다음 "회원정보 수정 3" 글도 읽어주길 바란다.
참고 자료 : 이지업 강의 사이트 "스프링부트 SNS프로젝트 - 포토그램 만들기"
'Spring Boot > 회원 관리 4 - 회원정보 수정' 카테고리의 다른 글
회원정보 수정 4 (0) 2021.12.13 회원정보 수정 3 (0) 2021.12.12 회원정보 수정 1 (0) 2021.12.11